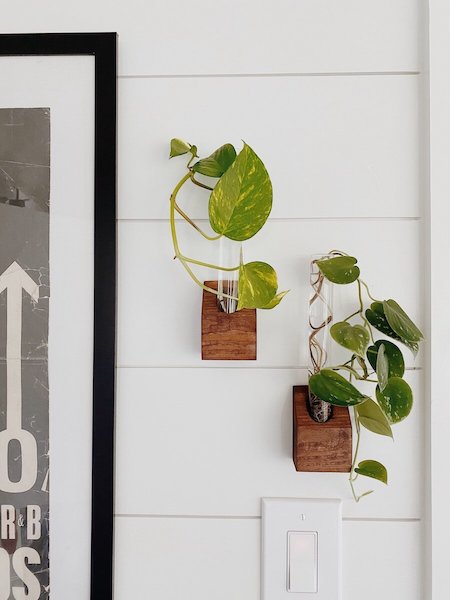
To say I love plants would be a little redundant, but I do. During quarantine I discovered my true love in the plant world though by propagating all my plant babies over and over again. Naturally, a DIY Propagation Station Wall was a trend I just couldn’t resist jumping on!
I love how insanely easy propagations are. No need to mess with soil or fret about watering while you’re on vacay. I try to change out their water weekly, but even that I’ve gotten lazy about at times and found they can hang out in whatever water their in for a pretty long time.
If you’re a plant lover than you’ve no doubt probably come across the hanging plant propagation stations you can buy. They’re gorgeous and fun and… expensive! I couldn’t bring myself to buy one knowing I could put one together myself for just a few bucks. Of course I went ahead and bought the glass tubes for them and then they sat for about 6 months while I worked on a million other way more important projects. But here we are, months later and the time had finally come.
This project was pretty simple and easy, although I really didn’t know what I was doing exactly so it took a little extra thought. In the future though it would only take me a couple minutes to whip one up again.
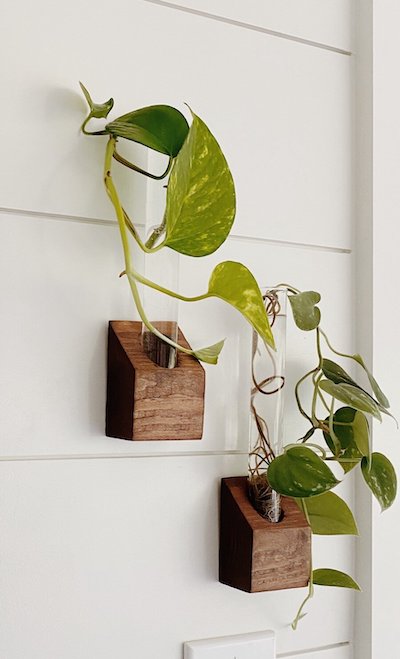
I made mine single size, but you can easily drill multiple holes for a multiple holder. I love the idea of doing a whole bunch of these for a full DIY Propagation wall!
Disclosure – This post contains affiliate links that I may earn a small commission on with no additional cost to you.
What You’ll Need
- 2×4 (I grabbed one of the small 2 ft pieces they have at Lowes)
- Drill with 1 Inch bit
- Chop Saw
- Stain
- Sanding paper and/or sponges
- Frame hanger
- Glass Test Tubes
How to Make A DIY Propagation Station Wall
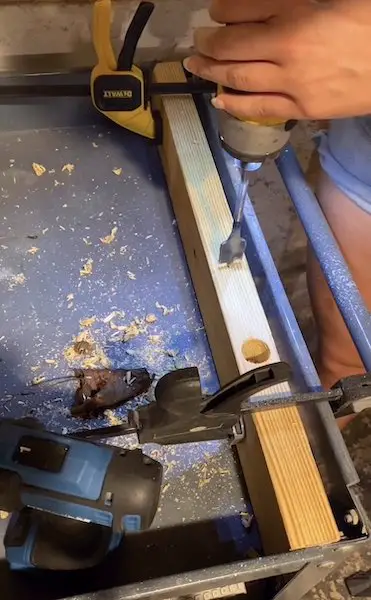
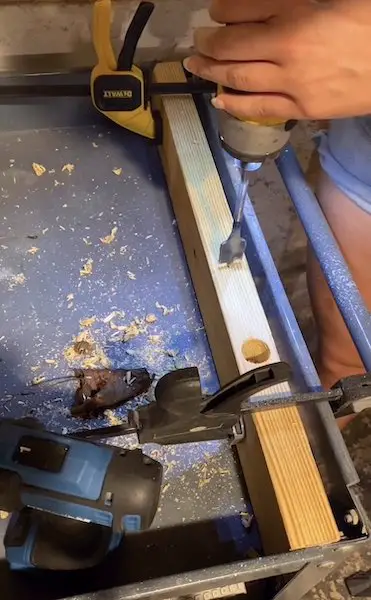
Secure your wood 2” side up and drill pilot hole in the center of the wood. A pilot hole is simple a hole made with a smaller bit, so your wood doesn’t crack when you move to the bigger bit. I used a 1/8” bit for my pilot hole. Once you have your pilot hole drilled, move to the 1” bit and drill about halfway down your piece of wood.
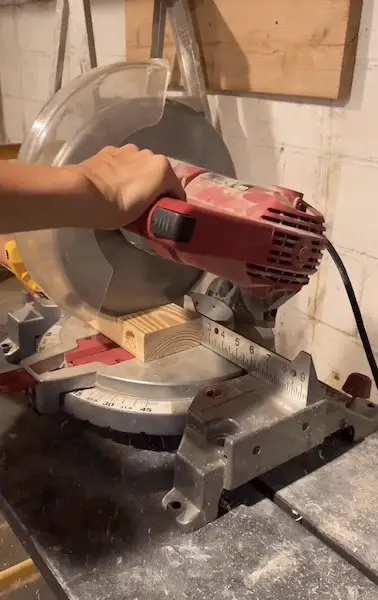
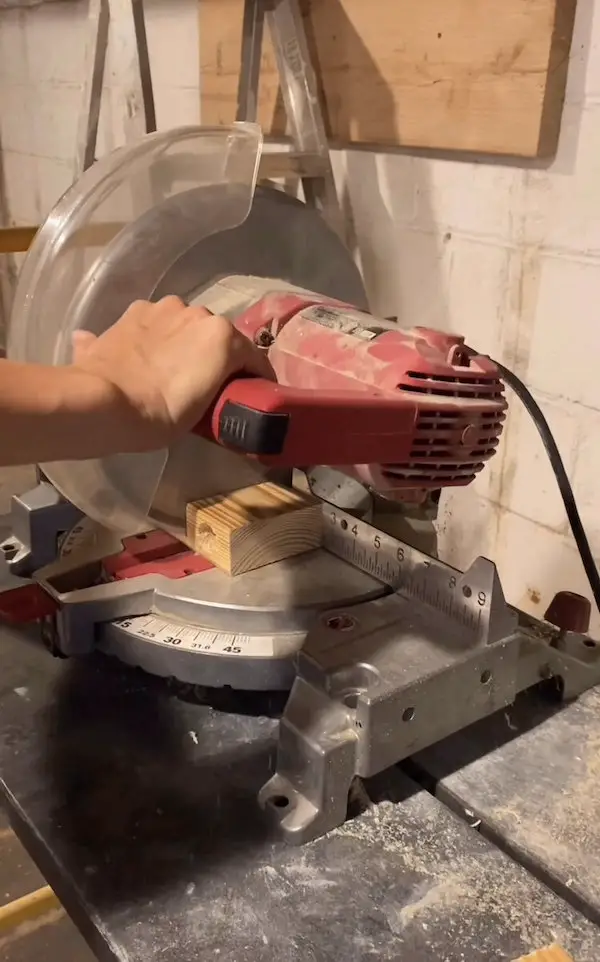
Measure and mark a line 3/4” from either side of the hold you drilled. Use a chop saw to cut on both lines.
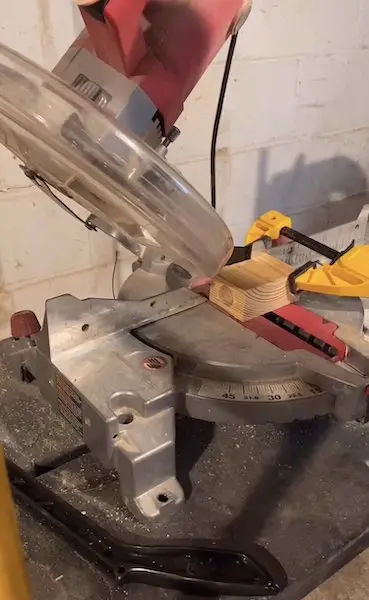
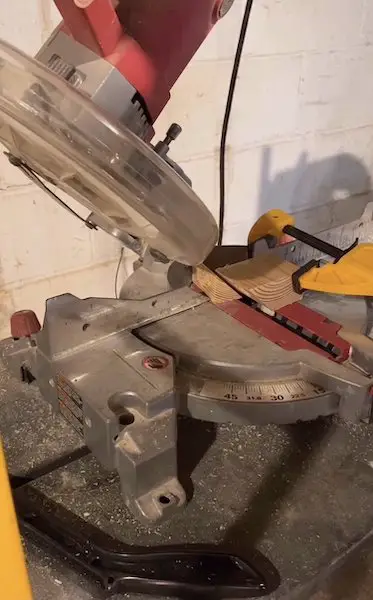
Set your chop saw to a 45 degree angle. Line up your wood so it cuts through your drilled hole. One in place, secure your wood with a clamp, and double check your angle to ensure you clamp is not in the way. One your wood and clamp are set securely, cut your angle.
Sand down all sides of your cradle. You can use a sheet of sanding paper rolled up to sand the inside of the hole down as well. Clean sanding dust off thoroughly before staining the color of your liking. Allow to fully dry.
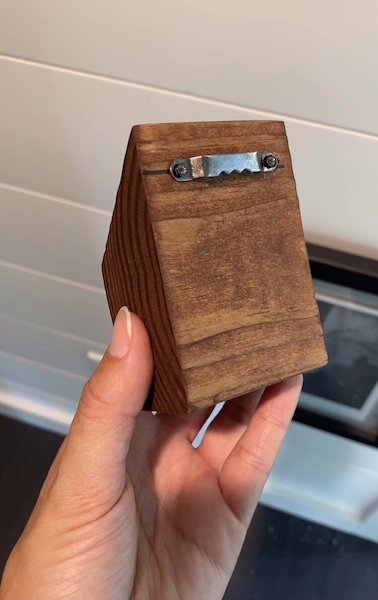
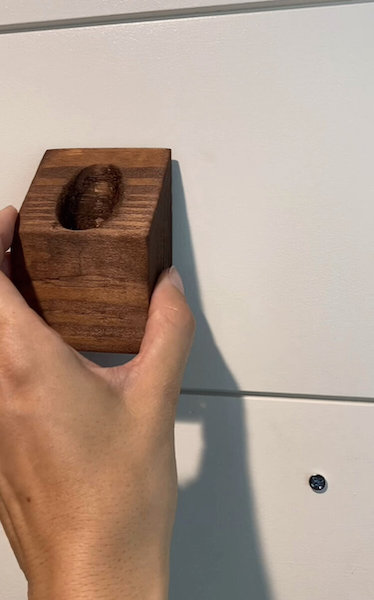
On the back of the cradle measure and mark a parallel line 1/2” down from the top. Use this to line up your frame hanger and mark the hole spots. Pre-drill holes, then screw in hanger.
You’re done!
Other tips + Ideas
- You can instead get nail in picture frame hangers if you don’t want to use the screw in kind. I felt the screw-ins were a little bit more stable, but I’m sure you’d probably be fine either way!
- Add a poly coat on top of your stain to seal it in. I opted to just leave the stained wood as-is because I liked the look, but depending on how it holds up I can always re-stain any poly in the future too. These aren’t heavy-use items so I’m not too worried about the stain being left raw personally.
- For a full DIY wall propagation station you could make multiples of these at once and create a really fun accent wall.
- Don’t have a chop saw? Skip the cutting and drill enough holes to fill the size of your wood. The 45 cut is purely for looks, so you can leave your wood squared and still have the same usability!
- Some lovely folks on my tiktok had some other great uses for these cradles, including using them as candle holders or swapping propagations for air plants – both would also be great uses!
Have you tried propagations yet? I swear, they’re the perfect plant option for anyone. They would even be fun to do with kids so they can see how roots form. Some of my propagations I move into pots once they root, but some I leave in water indefinitely because I just love the look!
These little propagation cradles are the perfect mix of plant love and home decor goodness. With how easy they are to make I’ll have to stop myself from putting some in every room of our house!

COMMENTS